Showing posts with label home decor. Show all posts

Monday, August 13, 2012

made it // wood pallet coffee table

Hey friends! As you can see I don't have a new Make It today. We're going with something we've made before and sharing that with you. Hope you don't mind! 
Over a year ago, Husband made us a wood pallet coffee table. We are business neighbors with a local office supply shop so we get to see lots of pretty pallets. This also explains all our pallets turned displays in our shop! 
Anyways, there are several ways to go about making a pallet coffee table, but this is how we did ours:
1) We found a clean wood pallet 2) Attached furniture legs found at our local hardware store. 3) Ordered glass to go on top of our table. We decided to have our pallet upside down so we could put items like books, coasters, and our remotes inside and keep the top clean but have our items visible. 
I love this table so much. And it's fairly inexpensive! The most expensive piece was the glass of course. The pallet was free, legs were $12 and the glass was $50. It's a fun diy project if you need a new coffee table with some character. 

Have you made anything with wood pallets? 
Enjoy your Monday! 
♥ 


Monday, December 12, 2011

Make It // Pom poms

I've been getting a little bored with the fabric banner we have above our bed so I decided to make pom pom garland to put there instead; however I don't have a fancy pom pom maker.
For today's Make It I'm going to show you how to make a pom pom without a maker bought from the store. 
Let's get started!
You will need:
cardboard
yarn
scissors
x-acto knife 

How to make the pom pom maker:
1. Get a small bowl and trace two circles on your cardboard. My bowl is 4 inches. (To get a small pom use a smaller circle.)
2. Cut out your circles
3. Now it's time to draw a smaller circle in the center. I used a small spool that was a 1 inch.
4. Cut out the small circle with your x-acto knife.
5. Place the cardboard with the center cut out on top of the other. Now trace a circle onto that one so they line up perfectly.
6. With your cardboard circles still stacked cut a slit through both of them. 

We have finished making our pom pom maker! Let's make us some pom poms!

1. Slip the yarn through the hole from under.
2. Sandwich the yarn between the two cardboard circles.
3. Bring your yarn through the slit, and wrap around and repeat all the way around to the other side. 
4. When you get to the right side turn and go back repeating the steps above.
You can keep going until the center circle disappears with yarn, but this is where I usually stop. You can cut your yarn and wrap it in with the rest.
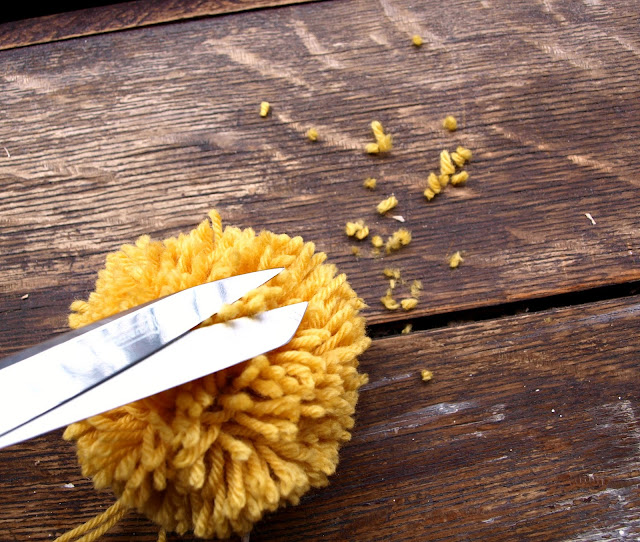
5. Once you have enough yarn wrapped place your scissors between the cardboard circles and begin to cut your yarn.
So fluffy!
6. Get some extra yarn and put it between the two cardboard circles, bring the two ends together tightly.
7. Tie a knot twice! You want it to be secure!
8. Pull your yarn out and guess what...
You're done! Throw your pom pom in the air! WOO!
Trim the yarn if it's uneven.
If you'd like a smaller pom pom you can use a smaller circle!
Here's a smaller one that I made. I put a wood stick through it and put it in a vase. It's now sittin' pretty on my night stand!
I made my garland by stitching yarn through the center of each pom pom.

I hope you guys enjoyed this tutorial. There is so much you can make with pom poms! For example, add with your presents this holiday season.

Happy Making!! 

Tuesday, July 12, 2011


We moved into our current place three months ago and we're still trying to decorate. We move so much that I feel like we lose belongings along the way! Does that happen to anyone else? So I feel like we've been starting over in the decorating department. I really love this house we are in and it's in a historic district (built in 1906).
This weekend I made a simple banner to hang above our bed because it's been bothering me being empty! We were originally wanting to get Berkley Illustration prints to put above our bed. Maybe soonish. But for now I'm happy with my little fabric banner.


Tuesday, March 10, 2009

The new home

We are COMPLETELY done with moving! Riley and I were hard at work all day yesterday and today's result: no boxes to trip over!! YAY!!!
It feels great to finally be comfy in the new house. We still have some things we want to make and hang up but that'll come soon.
Let's take a little tour around our little cozy home, shall we?
The living room:
The view from my craft room


I had to get rid of a lot of books since the bookshelf is smaller than I'd like.

My toys!

The Kitchen:

Our new awesome dish towel from Utilitarianfranchise.etsy.com

My craft room:
(sorry the picture is so dark!)

I'm waiting for the prints I ordered on etsy to arrive, so for now, my wall looks awkward.

The adorable wooden mushrooms were a christmas gift from Riley. He found them at craftsty.etsy.com
And these little crochet cactuses from catzillacrafts.etsy.com have traveled with me through 2 moves! I don't think I can have a house without them!

My sewing corner!

The Bedroom:

My accessories corner.


We also have a laundry room but I'm sure you don't care to see that.
And that's our home so far!

The song on repeat this week is 1901 by PHOENIX

Friday, August 22, 2008

meowzers! I can't think of a title

Yesterday Riley and I started our day with some antique shopping. We were boiling over with excitement and couldn't wait to see what we could discover there. Once we got there we walked around slowly looking at everything we could. We especially had an eye out for porcelain type trinkets to decorate a shelf with. What did we find? Nothing. We were super bummed. I did however come across a spool holder exactly like mine that I found at a garage sale for $5.

But my spool holder's twin at the antique shop was $45. That's correct. $45.
We ended up at Hobby Lobby and bought some 50% off frames.


Our plan was to get these frames and paint them all white and place them on our back wall of the living room.

And simply enough, we did just that.


I also received my sparrow salt & pepper shakers yesterday from Patina! I'm so in love with them.


In stelabird news, I finished up my custom orders and have now moved on to filling up my boutiques! finally!! I'm currently making owl snugglies and I've even added some colored ones to the mix. We'll see how it goes. I'll post pictures of them once they are complete. I also bought brown fur because I have little big foots on my mind. I've been hearing about that big foot hoax and how that man got fired from the police force. Little big foot calls me. I would call him little foot but that just makes me think of The Land Before Time. Movie made me cry. Anyways, tonight I get to see my boy in action: Mayola is playing tonight at Joe's in Stillwater. And tomorrow I help my sissy move into her new apt. in OKC.
Have a great weekend everyone!